
在本教程中,你将学习如何使用 Cloudflare Workers 和 Cloudflare Image Resizing 以编程方式生成自定义 YouTube 缩略图。你可能希望生成自定义 YouTube 缩略图,以自定义缩略图的设计、号召性用语和所用图片,鼓励更多观众观看你的视频。
本教程将帮助你了解如何使用 Images、Image Resizing 和 Cloudflare Workers。
所有教程都假设你已经完成了快速入门指南,该指南帮助你设置 Cloudflare Workers 账户、C3 ↗ 和 Wrangler。
要跟随本教程,请确保机器上已安装 Node、Cargo 和 Wrangler。
在本教程中,你将学习如何:
- 使用 Cloudflare 仪表板或 API 将图片上传到 Cloudflare。
- 使用 Wrangler 设置 Worker 项目。
- 在 Worker 中使用图片变换处理图片。
要生成自定义缩略图,首先需要将背景图片上传到 Cloudflare Images。这将作为你用于变换以生成缩略图的图片。
Cloudflare Images 允许你以快速安全的方式存储、调整大小、优化和交付图片。要开始使用,将图片上传到 Cloudflare 仪表板或使用 Upload API。
要使用 Cloudflare 仪表板上传图片:
-
在 Cloudflare 仪表板中,前往 Transformations(转换) 页面。
Go to Transformations ↗ -
使用 Quick Upload(快速上传) 拖放图片或点击浏览并从本地文件选择文件。
-
图片上传后,使用生成的 URL 查看。
要使用 Upload via URL API 上传图片,请参阅以下示例:
curl --request POST \
 --url https://api.cloudflare.com/client/v4/accounts/<ACCOUNT_ID>/images/v1 \
 --header 'Authorization: Bearer <API_TOKEN>' \
 --form 'url=<PATH_TO_IMAGE>' \
 --form 'metadata={"key":"value"}' \
--form 'requireSignedURLs=false'ACCOUNT_ID:当前用户的账户 ID,可在账户设置中找到。API_TOKEN:需要生成,作用域为 Images 权限。PATH_TO_IMAGE:表示要上传图片的 URL。
你将收到类似以下的响应:
{
	"result": {
		"id": "2cdc28f0-017a-49c4-9ed7-87056c83901",
		"filename": "image.jpeg",
		"metadata": {
			"key": "value"
		},
		"uploaded": "2022-01-31T16:39:28.458Z",
		"requireSignedURLs": false,
		"variants": [
			"https://imagedelivery.net/Vi7wi5KSItxGFsWRG2Us6Q/2cdc28f0-017a-49c4-9ed7-87056c83901/public",
			"https://imagedelivery.net/Vi7wi5KSItxGFsWRG2Us6Q/2cdc28f0-017a-49c4-9ed7-87056c83901/thumbnail"
		]
	},
	"success": true,
	"errors": [],
	"messages": []
}
现在你已经上传了图片,将用它作为视频缩略图的背景图片。
上传图片后,创建一个 Worker,使你能够将文本转换为图片。此图片可用作你上传的背景图片上的叠加层。使用 rustwasm-worker-template ↗。
开始之前,你需要:
-
最新版本的 Rust ↗。
-
访问
cargo-generate子命令:cargo install cargo-generate
使用 worker-rust 模板创建新的 Worker 项目:
cargo generate https://github.com/cloudflare/rustwasm-worker-template现在需要对项目目录中的文件进行一些更改。
- 在
lib.rs文件中,添加以下代码块:
use worker::*;
mod utils;

#[event(fetch)]
pub async fn main(req: Request, env: Env, _ctx: worker::Context) -> Result<Response> {
   // Optionally, get more helpful error messages written to the console in the case of a panic.
   utils::set_panic_hook();

   let router = Router::new();
   router
       .get("/", |_, _| Response::ok("Hello from Workers!"))
       .run(req, env)
       .await
}- 更新
worker-to-text项目目录中的Cargo.toml文件以使用 text-to-png ↗,这是一个用于将文本渲染为 PNG 的 Rust 包。通过运行以下命令添加依赖:
cargo add [email protected]- 将
text_to_png库导入worker-to-text项目的lib.rs文件。
use text_to_png::{TextPng, TextRenderer};
use worker::*;
mod utils;

#[event(fetch)]
pub async fn main(req: Request, env: Env, _ctx: worker::Context) -> Result<Response> {
   // Optionally, get more helpful error messages written to the console in the case of a panic.
   utils::set_panic_hook();

   let router = Router::new();
   router
       .get("/", |_, _| Response::ok("Hello from Workers!"))
       .run(req, env)
       .await
}- 更新
lib.rs以创建handle-slash函数,该函数将根据 URL 查询参数中传递的文本激活图片变换。
use text_to_png::{TextPng, TextRenderer};
use worker::*;
mod utils;

#[event(fetch)]
pub async fn main(req: Request, env: Env, _ctx: worker::Context) -> Result<Response> {
   // Optionally, get more helpful error messages written to the console in the case of a panic.
   utils::set_panic_hook();

   let router = Router::new();
   router
       .get("/", |_, _| Response::ok("Hello from Workers!"))
       .run(req, env)
       .await
}

async fn handle_slash(text: String) -> Result<Response> {}- 在
handle-slash函数中,通过将其分配给 renderer 值来调用TextRenderer,指定要使用自定义字体。然后,使用render_text_to_png_data方法将文本转换为图片格式。在此示例中,自定义字体(Inter-Bold.ttf)位于项目根目录的/assets文件夹中,用于生成缩略图。你必须更新此部分代码以指向你的自定义字体文件。
use text_to_png::{TextPng, TextRenderer};
use worker::*;
mod utils;

#[event(fetch)]
pub async fn main(req: Request, env: Env, _ctx: worker::Context) -> Result<Response> {
   // Optionally, get more helpful error messages written to the console in the case of a panic.
   utils::set_panic_hook();

   let router = Router::new();
   router
       .get("/", |_, _| Response::ok("Hello from Workers!"))
       .run(req, env)
       .await
}

async fn handle_slash(text: String) -> Result<Response> {
  let renderer = TextRenderer::try_new_with_ttf_font_data(include_bytes!("../assets/Inter-Bold.ttf"))
    .expect("Example font is definitely loadable");

  let text_png: TextPng = renderer.render_text_to_png_data(text.replace("+", " "), 60, "003682").unwrap();
}- 重写
Router函数,当 URL 中传递查询时调用handle_slash,否则返回"Hello Worker!"作为响应。
use text_to_png::{TextPng, TextRenderer};
use worker::*;
mod utils;

#[event(fetch)]
pub async fn main(req: Request, env: Env, _ctx: worker::Context) -> Result<Response> {
   // Optionally, get more helpful error messages written to the console in the case of a panic.
   utils::set_panic_hook();

  let router = Router::new();
    router
      .get_async("/", |req, _| async move {
        if let Some(text) = req.url()?.query() {
          handle_slash(text.into()).await
        } else {
          handle_slash("Hello Worker!".into()).await
        }
      })
      .run(req, env)
        .await
}

async fn handle_slash(text: String) -> Result<Response> {
  let renderer = TextRenderer::try_new_with_ttf_font_data(include_bytes!("../assets/Inter-Bold.ttf"))
    .expect("Example font is definitely loadable");

  let text_png: TextPng = renderer.render_text_to_png_data(text.replace("+", " "), 60, "003682").unwrap();
}- 在
lib.rs文件中,将头设置为content-type: image/png,以便响应正确渲染为 PNG 图片。
use text_to_png::{TextPng, TextRenderer};
use worker::*;
mod utils;

#[event(fetch)]
pub async fn main(req: Request, env: Env, _ctx: worker::Context) -> Result<Response> {
   // Optionally, get more helpful error messages written to the console in the case of a panic.
   utils::set_panic_hook();

   let router = Router::new();
    router
      .get_async("/", |req, _| async move {
        if let Some(text) = req.url()?.query() {
          handle_slash(text.into()).await
        } else {
          handle_slash("Hello Worker!".into()).await
        }
      })
      .run(req, env)
        .await
}

async fn handle_slash(text: String) -> Result<Response> {
  let renderer = TextRenderer::try_new_with_ttf_font_data(include_bytes!("../assets/Inter-Bold.ttf"))
    .expect("Example font is definitely loadable");

  let text_png: TextPng = renderer.render_text_to_png_data(text.replace("+", " "), 60, "003682").unwrap();

  let mut headers = Headers::new();
  headers.set("content-type", "image/png")?;

  Ok(Response::from_bytes(text_png.data)?.with_headers(headers))
}
最终的 lib.rs 文件应如下所示。完整代码请参阅 GitHub ↗ 上的示例仓库。
use text_to_png::{TextPng, TextRenderer};
use worker::*;

mod utils;

#[event(fetch)]
pub async fn main(req: Request, env: Env, _ctx: worker::Context) -> Result<Response> {
    // Optionally, get more helpful error messages written to the console in the case of a panic.
    utils::set_panic_hook();

    let router = Router::new();

    router
        .get_async("/", |req, _| async move {
            if let Some(text) = req.url()?.query() {
                handle_slash(text.into()).await
            } else {
                handle_slash("Hello Worker!".into()).await
            }
        })
        .run(req, env)
        .await
}

async fn handle_slash(text: String) -> Result<Response> {
    let renderer = TextRenderer::try_new_with_ttf_font_data(include_bytes!("../assets/Inter-Bold.ttf"))
    .expect("Example font is definitely loadable");

    let text = if text.len() > 128 {
        "Nope".into()
    } else {
        text
    };

    let text = urlencoding::decode(&text).map_err(|_| worker::Error::BadEncoding)?;

    let text_png: TextPng = renderer.render_text_to_png_data(text.replace("+", " "), 60, "003682").unwrap();

    let mut headers = Headers::new();
    headers.set("content-type", "image/png")?;

    Ok(Response::from_bytes(text_png.data)?.with_headers(headers))
}
完成项目更新后,通过运行以下命令启动本地服务器以开发 Worker:
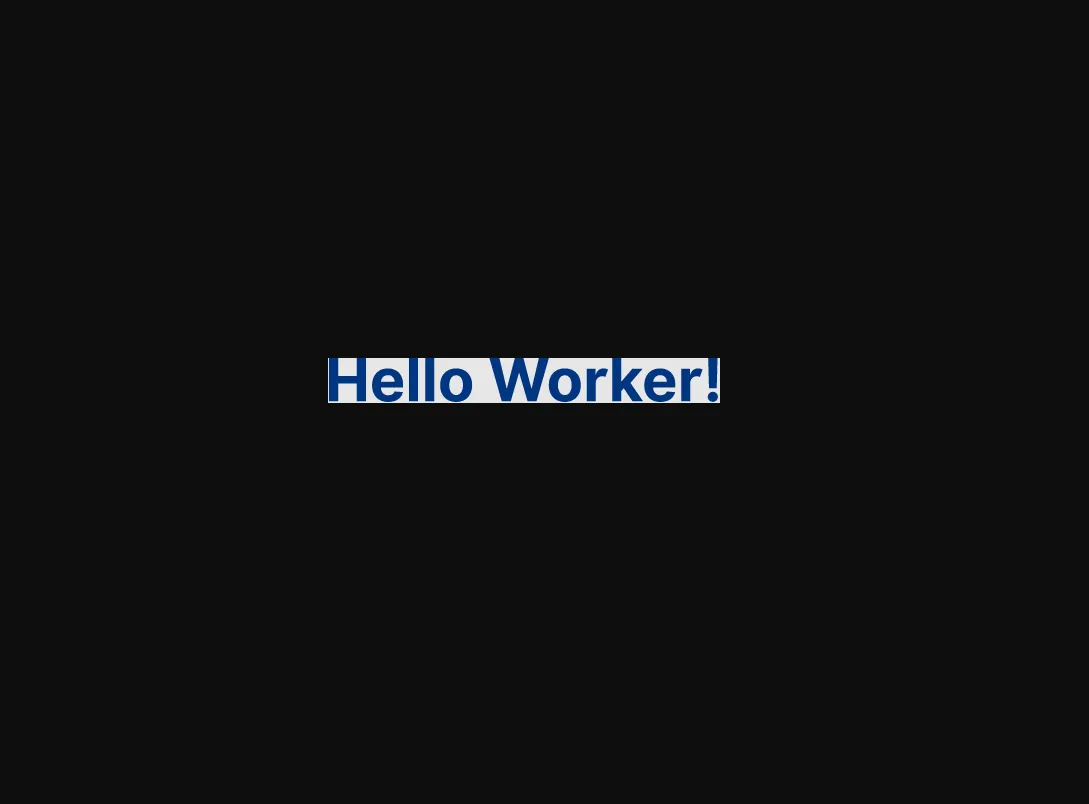
npx wrangler dev这应启动 localhost 实例并显示图片:
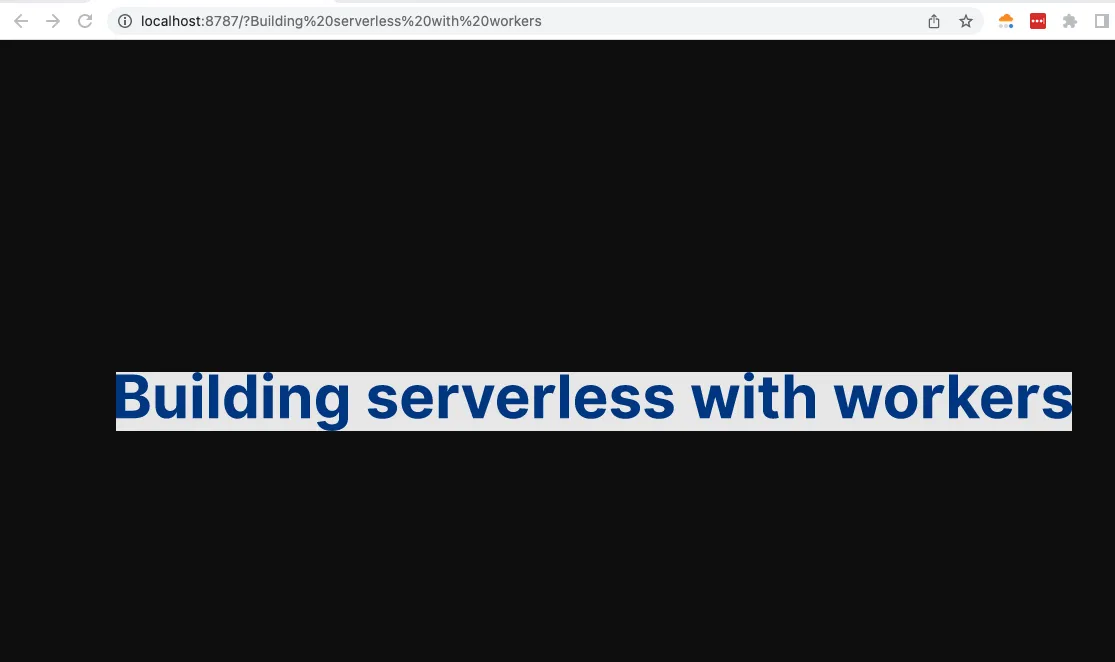
添加带自定义文本的查询参数,你将收到:
要部署 Worker,打开 Wrangler 文件并使用项目名称更新 name 键。以下是本教程项目名称的示例:
{
	"$schema": "./node_modules/wrangler/config-schema.json",
	"name": "worker-to-text"
}
"$schema" = "./node_modules/wrangler/config-schema.json"
name = "worker-to-text"然后运行 npx wrangler deploy 命令部署 Worker。
npx wrangler deploy运行 wrangler deploy 后将为 Worker 生成 .workers.dev 域名。你将在主缩略图中使用此域名。
通过运行以下命令创建 Worker 以提供你上传到 Images 的图片:
npm create cloudflare@latest -- thumbnail-imageyarn create cloudflare thumbnail-imagepnpm create cloudflare@latest thumbnail-image进行设置时,请选择以下选项:
- 对于 What would you like to start with?,选择
Hello World example。 - 对于 Which template would you like to use?,选择
Worker only。 - 对于 Which language do you want to use?,选择
JavaScript。 - 对于 Do you want to use git for version control?,选择
Yes。 - 对于 Do you want to deploy your application?,选择
No(部署前我们还会做一些修改)。
要开始开发 Worker,cd 进入新项目目录:
cd thumbnail-image这将创建名为 thumbnail-image 的新 Worker 项目。在 src/index.js 文件中,添加以下代码块:
export default {
	async fetch(request, env) {
		const url = new URL(request.url);
		if (url.pathname === "/original-image") {
			const image = await fetch(
				`https://imagedelivery.net/${env.CLOUDFLARE_ACCOUNT_HASH}/${IMAGE_ID}/public`,
			);
			return image;
		}
		return new Response("Image Resizing with a Worker");
	},
};
将 env.CLOUDFLARE_ACCOUNT_HASH 更新为你的 Cloudflare 账户 ID。将 env.IMAGE_ID 更新为你的 图片 ID。
运行 Worker 并前往 /original-image 路由查看图片。
现在你将使用 Cloudflare 图片变换,通过 fetch 方法,将动态文本图片作为叠加层添加到你上传的背景图片上。首先在不同路由上显示结果图片。将新路由命名为 /thumbnail。
export default {
	async fetch(request, env) {
		const url = new URL(request.url);
		if (url.pathname === "/original-image") {
			const image = await fetch(
				`https://imagedelivery.net/${env.CLOUDFLARE_ACCOUNT_HASH}/${IMAGE_ID}/public`,
			);
			return image;
		}

		if (url.pathname === "/thumbnail") {
		}

		return new Response("Image Resizing with a Worker");
	},
};
接下来,使用 fetch 方法在背景图片上应用图片变换更改。叠加选项嵌套在 options.cf.image 中。
export default {
	async fetch(request, env) {
		const url = new URL(request.url);

		if (url.pathname === "/original-image") {
			const image = await fetch(
				`https://imagedelivery.net/${env.CLOUDFLARE_ACCOUNT_HASH}/${IMAGE_ID}/public`,
			);
			return image;
		}

		if (url.pathname === "/thumbnail") {
			fetch(imageURL, {
				cf: {
					image: {},
				},
			});
		}

		return new Response("Image Resizing with a Worker");
	},
};
imageURL 是用作背景图片的图片 URL。在 cf.image 对象中,指定要应用于背景图片的选项。
将背景图片添加到 GitHub 上的 assets 目录并推送更改到 GitHub。通过对图片执行左键单击并选择 Copy Remote File Url(复制远程文件 URL) 选项复制图片上传的 URL。
用复制的远程 URL 替换 imageURL 值。
if (url.pathname === "/thumbnail") {
	const imageURL =
		"https://github.com/lauragift21/social-image-demo/blob/1ed9044463b891561b7438ecdecbdd9da48cdb03/assets/cover.png?raw=true";
	fetch(imageURL, {
		cf: {
			image: {},
		},
	});
}
接下来,在图片对象中添加叠加选项。将图片调整为 YouTube 缩略图的首选宽度和高度,并使用 draw 选项,通过已部署的 text-to-image Worker URL 添加叠加文本。
fetch(imageURL, {
	cf: {
		image: {
			width: 1280,
			height: 720,
			draw: [
				{
					url: "https://text-to-image.examples.workers.dev",
					left: 40,
				},
			],
		},
	},
});
图片变换只能在部署 Worker 后进行测试。
要部署 Worker,打开 Wrangler 文件并使用项目名称更新 name 键。以下是本教程项目名称的示例:
{
	"$schema": "./node_modules/wrangler/config-schema.json",
	"name": "thumbnail-image"
}
"$schema" = "./node_modules/wrangler/config-schema.json"
name = "thumbnail-image"通过运行以下命令部署 Worker:
npx wrangler deploy该命令将 Worker 部署到自定义 workers.dev 子域名。前往 .workers.dev 子域名并访问 /thumbnail 路由。
你应该看到带有 Hello Workers! 文本的调整大小后的图片。

现在你将使应用的文本变为动态。使文本动态化将允许你更改文本并自动在图片上更新。
要添加动态文本,将附加到 /thumbnail URL 的任何文本作为查询参数追加,并将其作为参数传递给 text-to-image Worker URL。
for (const title of url.searchParams.values()) {
	try {
		const editedImage = await fetch(imageURL, {
			cf: {
				image: {
					width: 1280,
					height: 720,
					draw: [
						{
							url: `https://text-to-image.examples.workers.dev/?${title}`,
							left: 50,
						},
					],
				},
			},
		});
		return editedImage;
	} catch (error) {
		console.log(error);
	}
}
这将始终返回你作为查询字符串传递的文本,显示在生成的图片中。此示例 URL https://socialcard.cdnuptime.com/thumbnail?Getting%20Started%20With%20Cloudflare%20Images ↗ 将生成以下图片:

完成本教程后,你已成功制作自定义 YouTube 缩略图生成器。
在本教程中,你学习了如何使用 Cloudflare Workers 和 Cloudflare 图片变换生成自定义 YouTube 缩略图。要了解更多关于 Cloudflare Workers 和图片变换的信息,请参阅使用 Worker 调整图片大小。