本指南将向您展示如何在 Cloudflare 上部署您自己的远程 MCP 服务器,提供两种选择:
- 无身份验证 — 任何人都可以连接和使用服务器(无需登录)。
- 有身份验证和授权 — 用户在访问工具之前需要登录,您可以根据用户的权限控制 Agent 可以调用哪些工具。
您可以从部署一个无身份验证的公共 MCP 服务器 ↗开始,然后稍后添加用户身份验证和范围授权。如果您已经知道您的服务器需要身份验证,可以跳到下一节。
下面的按钮将引导您完成将此示例 MCP 服务器 ↗部署到您的 Cloudflare 账户所需的所有操作:
部署后,此服务器将在您的 workers.dev 子域名上运行(例如 remote-mcp-server-authless.your-account.workers.dev/sse)。您可以立即使用 AI Playground ↗(远程 MCP 客户端)、MCP inspector ↗ 或其他 MCP 客户端连接到它。然后,一旦您准备好了,就可以自定义 MCP 服务器并添加您自己的工具。
如果您使用"部署到 Cloudflare"按钮,将在您的 GitHub 或 GitLab 账户上为您的 MCP 服务器设置一个新的 git 仓库,配置为每次您推送更改或将拉取请求合并到仓库的主分支时自动部署到 Cloudflare。然后您可以克隆此仓库,进行本地开发,并开始编写代码和构建。
或者,您可以使用如下所示的命令行在本地机器上创建新的 MCP 服务器。
npm create cloudflare@latest -- my-mcp-server --template=cloudflare/ai/demos/remote-mcp-authlessyarn create cloudflare my-mcp-server --template=cloudflare/ai/demos/remote-mcp-authlesspnpm create cloudflare@latest my-mcp-server --template=cloudflare/ai/demos/remote-mcp-authless现在,您已经设置了 MCP 服务器,依赖项已安装。进入该项目文件夹:
cd my-mcp-server在新项目的目录中,运行以下命令启动开发服务器:
npm start您的 MCP 服务器现在运行在 http://localhost:8787/sse。
在新终端中,运行 MCP inspector ↗。MCP inspector 是一个交互式 MCP 客户端,允许您连接到 MCP 服务器并从 Web 浏览器调用工具。
npx @modelcontextprotocol/inspector@latest在 Web 浏览器中打开 MCP inspector:
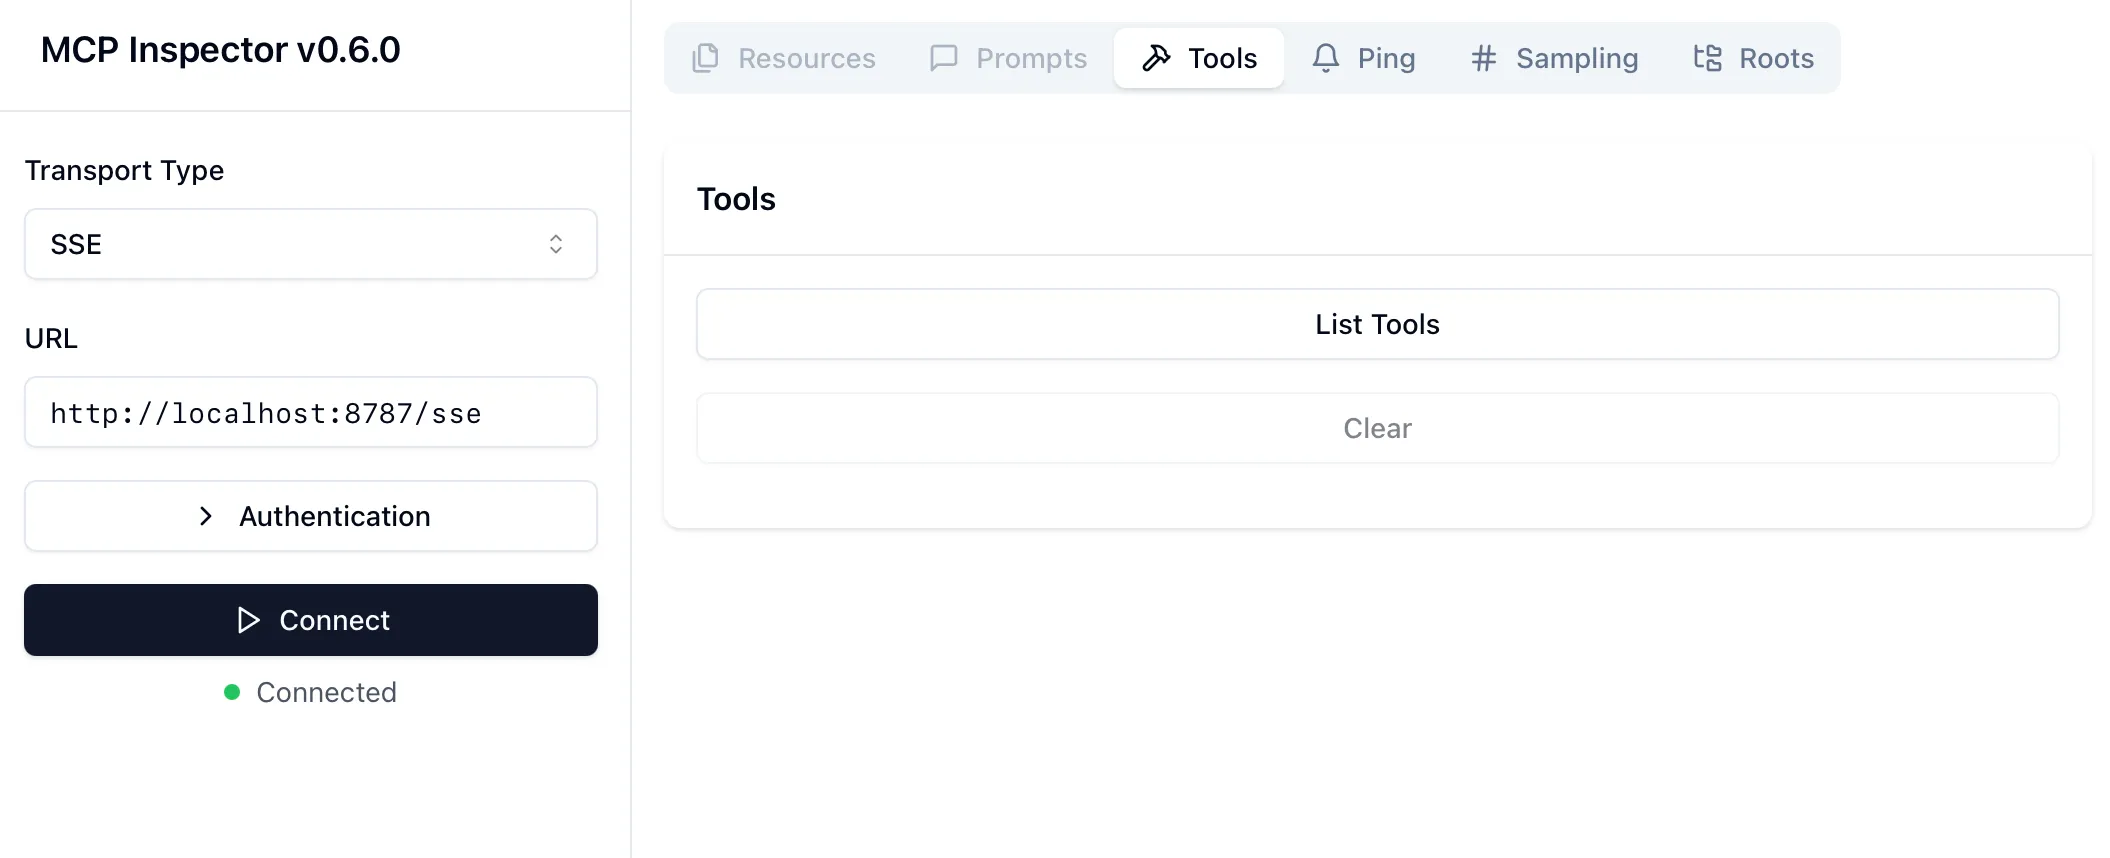
open http://localhost:5173在 inspector 中,输入您的 MCP 服务器的 URL http://localhost:8787/sse,然后点击 Connect。您应该看到"List Tools"按钮,它将列出您的 MCP 服务器公开的工具。

您可以在示例项目中使用以下 Wrangler CLI 命令将 MCP 服务器部署到 Cloudflare:
npx wrangler@latest deploy如果您已经将 git 仓库连接到带有 MCP 服务器的 Worker,您可以通过推送更改或将拉取请求合并到仓库的主分支来部署您的 MCP 服务器。
部署后,获取您已部署的 MCP 服务器的 URL,并在运行在 http://localhost:5173 上的 MCP inspector 中输入它。您现在有了一个部署到 Cloudflare 的远程 MCP 服务器,MCP 客户端可以连接到它。
现在您的 MCP 服务器正在运行,您可以使用 mcp-remote 本地代理 ↗将 Claude Desktop 或其他 MCP 客户端连接到它——即使这些工具还不是远程 MCP 客户端,并且在客户端不支持远程传输或授权。这让您可以测试与真正的 MCP 客户端交互时您的 MCP 服务器的交互体验。
更新您的 Claude Desktop 配置以指向您的 MCP 服务器的 URL。您可以使用 localhost:8787/sse URL 或您已部署的 MCP 服务器的 URL:
{ "mcpServers": { "math": { "command": "npx", "args": [ "mcp-remote", "https://your-worker-name.your-account.workers.dev/sse" ] } }}更新配置文件后重启 Claude Desktop 以加载 MCP 服务器。完成后,Claude 将能够调用您的远程 MCP 服务器。您可以通过让 Claude 使用您的工具之一来测试这一点。例如:"您能使用数学工具将 23 和 19 相加吗?"。Claude 应该调用该工具并显示 MCP 服务器生成的结果。
在此节中了解更多关于将远程 MCP 服务器与 MCP 客户端一起使用的其他方式。
现在您已经部署了公共 MCP 服务器,让我们看看如何使用 OAuth 启用用户身份验证。
您之前部署的公共服务器示例允许任何客户端连接并调用工具而无需登录。要添加身份验证,您将更新您的 MCP 服务器以充当 OAuth 提供商,处理安全登录流程并颁发 MCP 客户端可以用来进行经过身份验证的工具调用的访问令牌。
如果用户已经需要登录才能使用您的服务,这特别有用。启用身份验证后,用户可以使用其现有账户登录,并授权其 AI Agent 使用范围权限与您的 MCP 服务器公开的工具进行交互。
在此示例中,我们使用 GitHub 作为 OAuth 提供商,但您可以将您的 MCP 服务器与任何支持 OAuth 2.0 规范的 OAuth 提供商连接,包括 Google、Slack、Stytch、Auth0、WorkOS 等。
运行以下命令创建新的 MCP 服务器:
npm create cloudflare@latest -- my-mcp-server-github-auth --template=cloudflare/ai/demos/remote-mcp-github-oauthyarn create cloudflare my-mcp-server-github-auth --template=cloudflare/ai/demos/remote-mcp-github-oauthpnpm create cloudflare@latest my-mcp-server-github-auth --template=cloudflare/ai/demos/remote-mcp-github-oauth现在,您已经设置了 MCP 服务器,依赖项已安装。进入该项目文件夹:
cd my-mcp-server-github-auth然后,运行以下命令部署 MCP 服务器:
npx wrangler@latest deploy您会注意到,在示例 MCP 服务器中,如果您打开 src/index.ts,主要区别是 defaultHandler 设置为 GitHubHandler:
import GitHubHandler from "./github-handler";
export default new OAuthProvider({  apiRoute: "/sse",  apiHandler: MyMCP.Router,  defaultHandler: GitHubHandler,  authorizeEndpoint: "/authorize",  tokenEndpoint: "/token",  clientRegistrationEndpoint: "/register",});
这将确保您的用户被重定向到 GitHub 进行身份验证。但是要使其工作,您需要在以下步骤中创建 OAuth 客户端应用程序。
您需要创建两个 GitHub OAuth 应用程序 ↗以使用 GitHub 作为 MCP 服务器的身份验证提供商——一个用于本地开发,一个用于生产。
导航到 github.com/settings/developers ↗ 创建具有以下设置的新 OAuth 应用程序:
- Application name:
My MCP Server (local) - Homepage URL:
http://localhost:8787 - Authorization callback URL:
http://localhost:8787/callback
对于您刚创建的 OAuth 应用程序,将 OAuth 应用程序的客户端 ID 添加为 GITHUB_CLIENT_ID,生成客户端密钥,将其添加为 GITHUB_CLIENT_SECRET 到项目根目录的 .dev.vars 文件中,该文件将用于在本地开发中设置密钥。
touch .dev.varsecho 'GITHUB_CLIENT_ID="your-client-id"' >> .dev.varsecho 'GITHUB_CLIENT_SECRET="your-client-secret"' >> .dev.varscat .dev.vars运行以下命令启动开发服务器:
npm start您的 MCP 服务器现在运行在 http://localhost:8787/sse。
在新终端中,运行 MCP inspector ↗。MCP inspector 是一个交互式 MCP 客户端,允许您连接到 MCP 服务器并从 Web 浏览器调用工具。
npx @modelcontextprotocol/inspector@latest在 Web 浏览器中打开 MCP inspector:
open http://localhost:5173在 inspector 中,输入您的 MCP 服务器的 URL http://localhost:8787/sse,然后点击 Connect:
You should be redirected to a GitHub login or authorization page. After authorizing the MCP Client (the inspector) access to your GitHub account, you will be redirected back to the inspector. You should see the "List Tools" button, which will list the tools that your MCP server exposes.
You'll need to repeat these steps to create a new OAuth App for production.
Navigate to github.com/settings/developers ↗ to create a new OAuth App with the following settings:
- Application name:
My MCP Server (production) - Homepage URL: Enter the workers.dev URL of your deployed MCP server (ex:
worker-name.account-name.workers.dev) - Authorization callback URL: Enter the
/callbackpath of the workers.dev URL of your deployed MCP server (ex:worker-name.account-name.workers.dev/callback)
For the OAuth app you just created, add the client ID and client secret, using Wrangler CLI:
wrangler secret put GITHUB_CLIENT_IDwrangler secret put GITHUB_CLIENT_SECRETNow that you've added the ID and secret of your production OAuth app, you should now be able to connect to your MCP server running at worker-name.account-name.workers.dev/sse using the AI Playground ↗, MCP inspector or (other MCP clients), and authenticate with GitHub.
- Add tools to your MCP server.
- Customize your MCP Server's authentication and authorization.
- @2025 Cloudflare Ubitools
- Cf Repo